
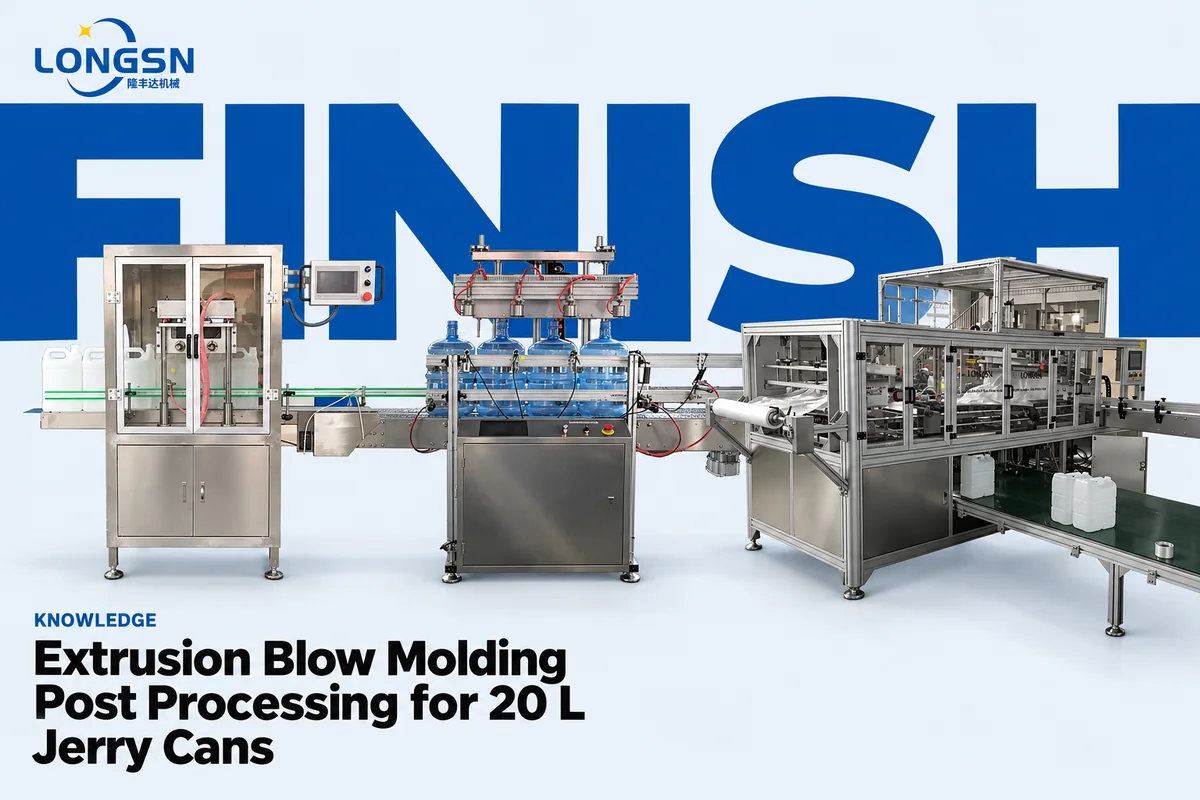
A blow moulder makes a container in one cycle, but the container is not ready to ship. Extrusion blow molding post processing turns it into a finished, tested and packed product, and on a 20 L jerry can the order and the speed of those steps decide how many good cans leave the plant. This article walks through the route station by station, uses the figures on the LONGSN product pages, and shows where a line usually gets stuck.
What extrusion blow molding post processing means
Extrusion blow molding post processing starts with a container that leaves the mould with extra plastic attached. A dome closes the mouth, a tail sits under the base and a seam runs along the parting line. Before anything else can happen, that flash has to come off. The deflashing methods article compares the ways of doing it.
After trimming, a container usually passes through four kinds of work. The neck is finished to give a cap a surface to seal on. The container is checked, most often for leaks. Some products get a handle ring, a label or a print. At the end the container is packed, in bags, cartons or on pallets. Closures are made and prepared separately and meet the container at the filler, not on this line.
The mix depends on the product. A water bottle has no neck dome and may skip the cutter. An oil jerry can needs the cutter and a strict leak check, because a seep can spoil filled product and the pallet it stands on. Other containers, such as drums, may need less. This article follows one common case, a 20 L HDPE jerry can, and notes where a 5 gallon water bottle differs.
The route from moulder to bag
The LONGSN layout drawing for a bottle line shows one route. The blow moulder is first, with a mechanical arm that takes the container out of the mould. A flat conveyor and a conveyor system with a transition device carry it forward. The neck cutting machine is the fourth station, the leak tester the fifth and the bagging machine the sixth. The drawing also places a crusher and an elevator beside the blow moulder.
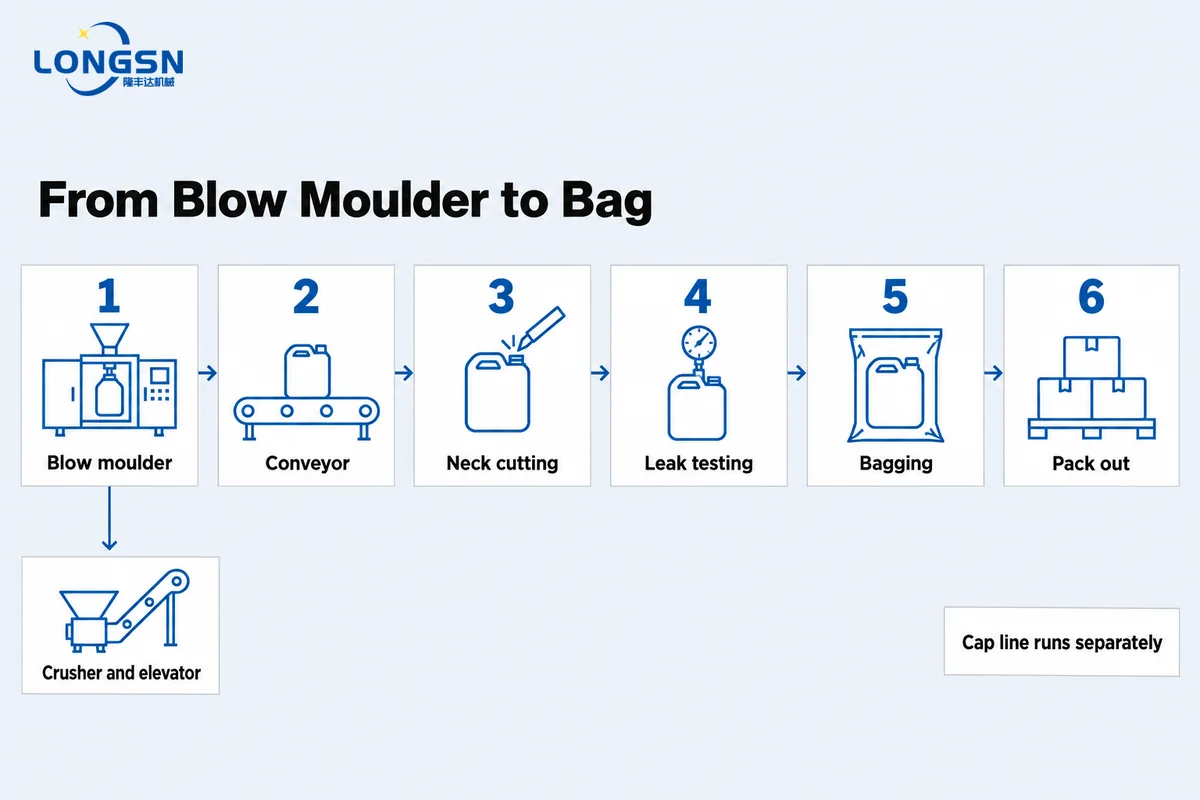
The order of extrusion blow molding post processing is fixed by what each machine needs. The leak tester seals against the rim of the container and the rim has to be cut first. The bagger must see only containers that passed, so the tester sits ahead of it. A container that fails the test is pushed off the line before it reaches the bag.
What happens to the flash
Every container sheds flash, and on a 20 L can that is a noticeable weight of plastic. The layout drawing places a crusher and an elevator beside the blow moulder. The usual use of such a pair is a regrind loop, where the dome and the tail are ground and lifted back to the extruder to be melted again. The loop keeps scrap from piling up and saves material.
Regrind has to be handled with care. It should be clean, kept apart from other grades and mixed back at a steady ratio, because a changing mix changes the melt and the wall thickness. The point for this article is simple. The post processing line should deliver the flash in a form that is easy to collect, and a clean cut in one piece is easier to grind than a pile of ragged shavings.
Station one, neck cutting
The neck cutting machine holds each container by its neck ring and cuts the dome off in one pass. For jerry cans and oil bottles the models are the LSN-C1 and the LSN-C4, both listed at up to 30 containers per minute depending on the bottle and the cutting heads. The LSN-C2 covers 1 ml to 30 L at 10 to 30 per minute. At 10 to 30 per minute the cutter handles 600 to 1,800 containers an hour, which is likely to be above the output of a single 20 L blow moulder, though you should check your own figure.
Because of that margin, the cutter is unlikely to be the limit on a large-container line. What matters at this station is the cut itself, a flat rim, square to the neck ring and free of burrs, because every later step depends on it. The category page on neck cutting machines shows the four cut types and what each does at the cap.
Station two, leak testing
Large containers are slower to test than small ones. A 20 L can holds a lot of air, so a leak takes longer to show up as a pressure drop, and the test has to wait for the pressure to settle. This is why leak testing is where large-container lines slow down. The article on empty bottle leak testing methods explains the reasons.
The 3 to 5 gallon tester is listed at 150 to 800 containers per hour with 1 to 4 stations, and a container range of 10 ml to 330 L. The one-station tester, listed at 1,200 to 3,200 per hour, is built for smaller bottles up to 160 mm wide. Output depends on the container volume and the number of stations, and the final figure is confirmed against your own container.
The tester seals the mouth, fills the container with air and reads the pressure decay. A container that cannot hold pressure is rejected automatically. Settings are stored per product on the PLC and one machine can handle several container sizes.
Station three, bagging
The bagging machine puts each empty container into a gusseted plastic bag and seals it, which keeps it clean in storage and transport. The LSN-BA200 places bags from a roll, covers 10 ml to 39 L and is listed at 3,000 to 9,000 pieces an hour. The LSN-BA100 is listed at 3,000 to 8,000 and the LSN-BS180 at 3,000 to 6,000, working from pre-made bags. The LSN-BA200 is controlled by a Mitsubishi PLC.
These are top speeds that apply to small bottles. A 20 L can is large and a bag for it is big, and the real output for a jerry can line is lower and has to be confirmed with a sample. The pages say that film size is customised to the packing size, and that the machines are designed to stand in line with a blow moulder.
The bagging pages describe a standard machine with a single in-feed conveyor, which means the container has to arrive in single file and at a steady pace. That is another reason to keep the leak tester and the bagger matched.
An optional station, the handle ring
Some large bottles take a handle ring on the neck, which makes them easier to carry. The LSN-A80 feeds the ring, sleeves it onto the neck and presses it, for bottles of 1.5 L to 18 L, customised to the bottle and the ring. The semi-automatic LSN-S200 covers 2 L to 10 L. A 20 L jerry can usually carries a moulded-in handle, and a ring applicator belongs on bottles in the lower part of the range.
Handling between the stations
Large containers are awkward to move. A 20 L can is light when empty but bulky, and it tips easily if the guide rails are wrong. Conveyors for a jerry can line need guides set to the can, a path that keeps the handle clear of the rail, and a gap between containers so that the neck cutter and the tester can pick each one up cleanly. Two cans touching on the conveyor can cause trouble at a test head.
Orientation matters too. The cutter and the tester both locate on the neck, so the cans must arrive upright and facing the right way. The blow moulder's take-out arm sets the first orientation, and the conveyor must keep it. That is why conveyors and transition devices are drawn on the layout and not bought as an afterthought.
Moving cans by hand between machines breaks this chain. It adds scuffs, dents and dust, and it makes the line depend on how many people are on shift. The bagging machine page says that automatic bagging replaces manual packing and avoids the contamination that hand touching can cause.
Rejects and what they tell you
Every reject is information about the blow moulder. A can that leaks at the base points to the pinch-off weld, a can that leaks at the neck points to the cut or the neck finish, and a rise in rejects over a shift points to a drift in the process. A line that pushes rejects into a bin and counts them gives the moulding team something to act on.
For this reason it helps to give the reject bin a clear place on the layout and to decide in advance who checks it. A tester that rejects well but whose rejects are tipped into general scrap throws away the information. The same holds for the cutter, where a rim that is starting to tear can be an early sign that a blade needs changing.
Where the line gets stuck
In extrusion blow molding post processing a line is as fast as its slowest station, and on a large-container line that is usually the leak tester. The table sets the listed figures side by side. The ranges are taken from the product pages and are not a promise for your bottle.
| Station | Listed output | Container range | What it means on a 20 L line |
|---|---|---|---|
| Neck cutting, LSN-C1 and LSN-C4 | Up to 30 per minute | Made to order | Likely faster than a 20 L blow moulder |
| Leak testing, 3 to 5 gallon tester | 150 to 800 per hour, 1 to 4 stations | 10 ml to 330 L | Often the slowest station, so station count matters |
| Bagging, LSN-BA200 | 3,000 to 9,000 per hour | 10 ml to 39 L | Top speed is for small bottles, confirm for a 20 L can |
| Handle ring, LSN-A80 | Set to the bottle | 1.5 L to 18 L | Optional, for the lower part of the range |
Here is an example, to show how the matching works. If a blow moulder with two heads makes 300 cans an hour, the neck cutter at 600 per hour or more keeps up easily. A leak tester with one station at the low end of its range, 150 per hour, does not, and a queue builds up behind the cutter. Two stations at that rate only just match the moulder, and a third gives some margin. This is arithmetic for illustration, not a LONGSN specification.
A short accumulation conveyor between the tester and the bagger absorbs small differences in pace, so that a brief stop on one machine does not stop the whole line. Conveyors are listed as part of the line and are specified on the layout, because there are no stand-alone conveyor models on the site.
Floor space
The three main machines take very different amounts of room, and the floor plan has to allow for each. The product pages give these figures.
| Machine | Listed size |
|---|---|
| Neck cutting machine, LSN-C1 | 1.6 m by 0.88 m by 1.73 m, 150 kg |
| Leak tester, LSN-LT2 (the 1 to 5 L model) | 1,600 by 620 by 1,600 mm |
| Bagging machine, LSN-BA200 | 5,540 by 1,460 by 2,200 mm |
The page for the 3 to 5 gallon tester does not list its size, so ask for it with the quotation. The bagging machine is by far the longest, so it decides how the line is folded. A straight line, a U-shape and an L-shape all work, and the choice follows the building and the position of the forklift aisle. The older article on bagging machine layout covers the shapes in more detail.
Mistakes to avoid when planning post processing
The first mistake in extrusion blow molding post processing is buying the machines one at a time. Each one is chosen for its own listed speed, and the line ends up with a fast cutter, a slow tester and a bagger that waits. Plan the stations together, from the output of the blow moulder backwards.
The second is sizing the leak tester from small-bottle figures. The high speeds on the tester pages belong to small containers. For a 20 L can use the low end of the range as a starting point and add stations until the line balances.
The third is leaving the conveyors for last. They decide whether cans arrive upright and spaced, and they take floor space that the machines also need.
The fourth is forgetting the reject path. Decide where bad cans go and who counts them before the line is built.
The fifth is copying this route onto a bottle that is made another way. A stretch blown water bottle, for example, may not need the cutter at all. A short check of the bottle with the supplier saves buying a machine that stays idle.
The cap side runs in parallel
The caps for 20 L cans and 5 gallon bottles are made and prepared on their own line. The LONGSN LSN-L2 cap liner machine is built for 5 gallon water caps and is listed at 4,000 to 7,000 caps an hour. Its parts are a hoist feeder, a rotary bowl cap feeder, a liner inserter fed by vibrator, and a detecting and counting step. The LSN-L2S is listed at 4,000 to 10,000 an hour.
Because the cap line runs separately from extrusion blow molding post processing, it does not slow the bottle line, and its output is chosen to match the filler, not the blow moulder. Cap and bottle meet at the filling line, which is outside the LONGSN line described here.
How a 5 gallon water bottle differs
A 5 gallon water bottle in PET or PC is usually stretch blown, which forms the neck finish in the process, so there is typically no dome to cut and the cutter can be left out. The leak test still applies, and the 3 to 5 gallon tester is built for it. The bottle may be bagged or stacked, and the cap gets a liner. If you run both 20 L cans and 5 gallon bottles, the leak tester can be shared, since settings are stored per product. Check your own bottle before deciding which stations you need.
What to send for a line proposal
The conveyor category lists four inputs that LONGSN needs for a line layout, and the same four apply to the whole route.
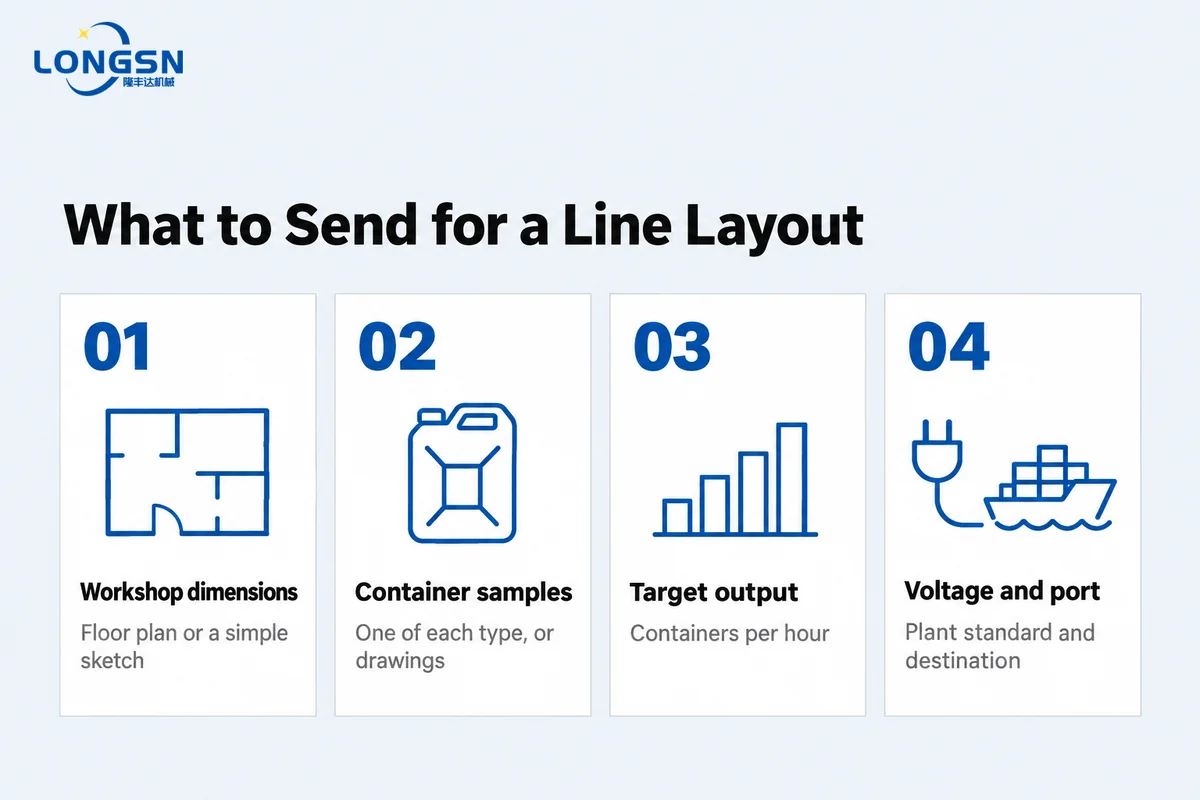
For extrusion blow molding post processing, send the floor plan or a sketch of the space, one sample or drawing of each container, the output you need per hour or the output of your blow moulder, and your plant voltage and destination port. The proposal comes back with the machines placed on your floor plan. Use the contact page to send them, or browse the bagging machine category and the leak tester category to see all models with photos and specifications.
Frequently asked questions
What is extrusion blow molding post processing?
It is everything done to a container after it leaves the mould. The flash is trimmed off, the neck is cut open, the container is checked for leaks, and it is bagged or boxed. Handles, labels and closures may be added too, depending on the product.
In what order should the post processing machines be placed?
Neck cutting comes first, because the leak tester needs a finished rim. Leak testing follows, so a failed container never reaches the bagger. Bagging is last. Conveyors join the stations, and the cap line runs separately.
Which station limits the speed of a 20 L jerry can line?
Usually the leak tester. A neck cutting machine runs at 10 to 30 containers per minute, while the LONGSN 3 to 5 gallon tester lists 150 to 800 per hour for 1 to 4 stations. More stations or a second tester brings it into step.
Does a 5 gallon water bottle need neck cutting?
Usually not. Water bottles in PET or PC are normally stretch blown with the neck finish already formed, and there is no dome to cut. Check with your bottle maker. The leak test and the cap liner step still apply.
Can the machines connect directly to a blow moulder?
Yes. The bagging pages describe machines that stand in line with the blow moulder, and the conveyor category describes conveyors that join the neck cutter, leak tester and bagger. The layout is drawn on your floor plan.
What does LONGSN need to propose a post processing line?
Four things. A floor plan or sketch of the workshop, samples or drawings of your containers, your target output per hour, and your plant voltage and destination port. The proposal returns with the machines placed on your layout.